
Are you looking to add a unique and beautiful touch to your home decor? If so, epoxy resin tables may be just the thing for you! This step by step guide will cover what supplies you’ll need, how to use the epoxy resin, and how to finish your table. It’s an easy and fun DIY project that will make a great addition to any room. So let’s get started on creating your own stunning epoxy resin tables.
What is the epoxy table
Epoxy resin is a type of plastic that is frequently used in the construction industry. It is made up of two parts, a resin and a hardener, which when mixed together create a strong bond. This makes it ideal for use in table construction as it creates a very sturdy surface.
Epoxy table is created by mixing the resin and hardener together and then pouring it onto the desired surface. The mixture will then begin to harden and set, creating a durable and long-lasting finish. Once the epoxy has set, you can then add any desired decoration or embellishments to personalize your table.
Why people needs this kind of tables to the home
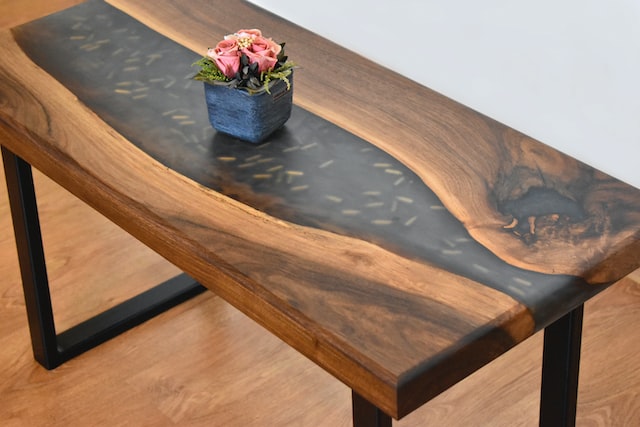
There are many reasons why people may want or need an epoxy resin table in their home. For some, it may be a functional necessity, such as needing a durable and easy-to-clean surface for working on projects or crafts. Others may appreciate the aesthetic appeal of a beautiful and unique piece of furniture. Still others may find that an epoxy resin table is the perfect way to show off their DIY skills and make a statement in their home.
Whatever the reason, an epoxy resin table can be a great addition to any home. With a little bit of planning and care, anyone can create a stunning and one-of-a-kind table that will be sure to impress guests and make everyday tasks more enjoyable.
Gather your supplies
The first thing you will need to do is gather all of your supplies. This includes the epoxy resin, hardener, mixing cups, stir sticks, gloves, and a dust mask. You will also need something to mix the epoxy on, such as a disposable plastic sheet or a non-stick silicon mat. Once you have all of your supplies, you are ready to start!
Mix the epoxy resin
When it comes to epoxy resin, there are two main types: table top epoxy resin and casting epoxy resin. Table top epoxy resin is a clear, thin liquid that cures to a hard, durable finish. This type of epoxy is typically used for coating tables or countertops. Casting epoxy resin is a thicker liquid that is used for creating decorative objects like jewelry or sculptures.
To mix the epoxy resin, you will need equal parts of both the resin and the hardener. Begin by measuring out the desired amount of each component into separate cups. Slowly pour the two liquids into a third cup, making sure to mix them together thoroughly. Use a stir stick to help with this process if necessary. It’s important to make sure that the mixture is completely combined; otherwise, the epoxy won’t cure properly.
Once the mixture is ready, you can begin working with it right away. Keep in mind that it will start to harden pretty quickly, so you’ll need to work fast. If you’re not ready to use it yet, you can store it in an airtight container for up to 24 hours.
Pour the epoxy resin
Before you begin, make sure to lay out a drop cloth or old newspapers to protect your work surface. Pour the epoxy resin into the mixing cup. Slowly add the hardener to the resin and mix thoroughly. Be sure to mix slowly and in a well-ventilated area, as the fumes from the hardener can be dangerous. Once the two components are fully mixed, pour the mixture into your mold. If you are using a silicone mold, you can tap it gently on the counter to help release any bubbles in the mixture. Then, use a heat gun or hair dryer to remove any remaining bubbles. Allow the mixture to cure for at least 24 hours before removing it from the mold.
Add your fillers
Whether you’re looking to add a little extra flair to your epoxy resin table or simply want to fill in some cracks, adding fillers is a great way to do so! There are a variety of different fillers that can be used with epoxy resin, ranging from glitter to beads. In this guide, we’ll show you how to add your fillers of choice and get the perfect results every time.
Before getting started, it’s important to note that not all fillers are compatible with all types of epoxy resin. In general, most fillers can be used with either clear or pigmented resin, but there are some (like mica powder) that should only be used with clear resin. Be sure to check the compatibility of your chosen filler before getting started.
Once you’ve selected your filler and confirmed that it’s compatible with your resin, it’s time to get started! The first step is to mix your filler into the resin according to the manufacturer’s instructions. Once the filler is thoroughly mixed in, you can begin pouring the mixture into your mold or onto your surface.
If you’re using glitter as a filler, we recommend sprinkling it over the wet resin rather than mixing it in beforehand. This will help prevent the glitter from settling at the bottom of your mold or surface.
Once you’ve added all of your desired fillers,
Let it cure
Once you have applied the epoxy resin to your table, you will need to let it cure. This can take up to 24 hours, depending on the temperature and humidity of your work area. During this time, it is important not to move or disturb the table so that the epoxy has time to set and harden properly. Once it is fully cured, you can enjoy your new epoxy resin table!
Sand and finish your table
If you’ve followed the previous steps in this guide, your table should now be fully coated in epoxy resin. The final step is to sand and finish the table to give it a smooth, professional look.
To sand the table, start with a coarse grit sandpaper and work your way up to a finer grit. Sanding with progressively finer grits will create a smoother surface. Once you’re satisfied with the smoothness of the surface, wipe away any dust with a damp cloth.
To finish the table, apply a clear top coat of polyurethane or lacquer. Allow the top coat to cure completely before using the table.

